Due to my extensive series of open-source panorama tutorials and the featuring of SaladoPlayer, I recieve mails from time to time, with different questions about the SaladoPlayer and it’s use. I started collecting some of those questions in a FAQ as appendix to the series Panoramic Photography Revealedand will continue to do so, as long as there are still questions coming in. Some questions didn’t really fit into that FAQ, others just went to far away from the original tutorials.
The SaladoPlayer and PanoPress – Publish your Panoramas easily in WordPress
Does PanoPress support panormas made with SaladoPlayer? Yes, it does! Just recently, the developers Omer Calev and Sam Rohn announced the release of version 1.0, which now supports SaladoPlayer. I asked for SaladoPlayer support in the PanoPress forum back in July 2011 and was told that it was already on their to-do list. With version 1.0 support of SaladoPlayer is now official, and as I am pleased to report, is working like a charm.
If you like to publish your panos with PanoPress, you have to install the plugin via your WordPress-backend first, or download it here and install it manually. After you did so, you need two things:
- A working instance of a panorama or virtual tour, using SaladoPlayer,
- a preview image to be shown in your post.
I will use a pano, that I published not so long ago. The index.html of the SaladoPlayer is located here:
https://www.tilmanbremer.de/panorama/ehrenwert2012/index.html
and the 900px wide preview image:
https://www.tilmanbremer.de/panorama/ehrenwert2012/katschhof.jpg
To make PanoPress do it’s magic, I use the shortcode as follows (notice that I inserted an extra space between the bracket and pano, so WordPress wouldn’t prozess the code):
[ pano file="https://www.tilmanbremer.de/panorama/ehrenwert2012/index.html" preview="https://www.tilmanbremer.de/panorama/ehrenwert2012/katschhof.jpg" width="900" height="400"]
The result looks like this:
[pano file=“https://www.tilmanbremer.de/panorama/ehrenwert2012/index.html“ preview=“https://www.tilmanbremer.de/panorama/ehrenwert2012/katschhof.jpg“ width=“900″ height=“400″]
To make it look like the example above, you need some additional settings in PanoPress settings tab. You need to check Show Play Button, Open panoramas in Panobox window and Windows Size: Fullscreen.
This was pretty easy, and that’s the beauty of PanoPress. Some issues, though:
- The shortcode might not work in your excerpt.
Depending on the theme you are using, the PanoPress shortcode might get filtered and so, no preview image is shown in the preview of the post, which is configured in WordPress as the excerpt. Please refer to the documentation of your theme to find out how to make it show and process shortcodes in excerpts.
- You might get conflicts with other plugins
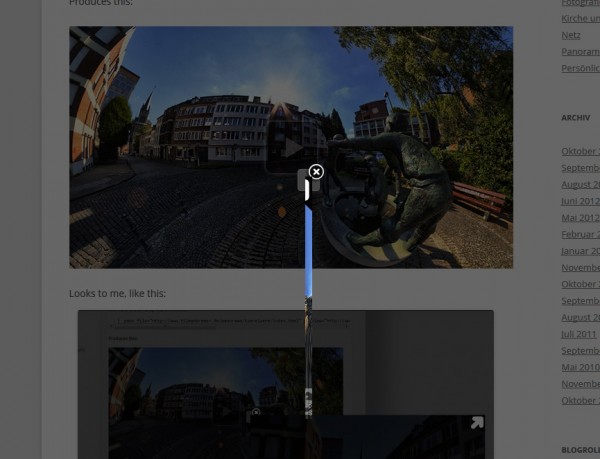
I was using the lightbox 2-plugin for my regular pictures all around my blog when I installed PanoPress. Unfortunately, these two plugins give each other a hard time and PanoPress stopped working eventually. This is how it looked like, when I opened a pano with PanoPress own panobox:

Sam Rohn told me to try another lightbox plugin and it worked. So, I am using lightbox plus since them, a very solid plugin that competes with lightbox 2, actually exceeding it’s features in some areas.
So, my advice is to use lightbox plus, you can see it in action by clicking on a picture of the random picture widget in the footer. If you encounter different plugin conflicts, feel free to report them in the PanoPress forum, your help would be greatly appreciated.
Links:
PanoPress.org
PanoPress in the WordPress Plugin Directory
SaladoPlayer
What are the directories and files you upload to wordpress in order to use with PanoPress?
I don’t use the wordpress-path for uploading my panoramas because I think the URL looks ugly when I link directly to my panorama somewhere. So I have a folder „panorama“ on my webserver where i put all the files in subfolders. See in the example above, here it is /panorama/ehrenwert2012/. Sometimes I use the upload-feature of wordpress for the preview image, because I need it anyway somewhere on my website and don’t want to upload it twice. This is why in the example above, the preview image is in /wp/wp-content/uploads/2012/10/
In the folder /panorama/ehrenwert2012/ I upload everything that I need for the panorama or the virtual tour to work, an index.html, the SaladoPlayer.swf and some folders, /plugins/, /panoramas/, /embed/ and so on. See the third part of tutorial-series to learn what those files are.
In den obigen Panoramen hast Du Links eingefügt ohne die bisherigen Pfeile sondern mit Kreisen. Das sieht sehr viel besser aus – weil sie auch das Panorama als Ganzes nicht so stören. Darf ich fragen, wie man das hinbekommt?
Sind die Panoramen von einem Hochstativ gemacht?
Es war sicherlich nicht leicht, keine Geisterbilder bei den vielen Leuten im Motiv zu haben. Tolle Panoramen.
Gruß
Steffen
Hallo Steffen,
das mit den Kreisen ist eigentlich keine große Kunst, das sind einfach andere Grafiken als die Pfeile. Ich habe die Kreise in Photoshop gemalt, in grau und mit einer gewissen Transparenz. eingebunden habe ich sie dann über folgenden Code:
< swf id="katschhof1ToBogenstand1" location="pan:-46,tilt:3,distance:1500" path="~hotspots/AdvancedHotspot-1.0.swf" mouse="onClick:loadBogenstand1">

< settings path="~hotspots/images/circle.png" beatUp="time:0.45,scale:1.4" beatDown="time:0.4" />

< /swf>
Die entsprechende Grafik heißt also circle.png.
Die Panoramen sind quasi von einem Hochstativ aufgenommen, um genau zu sein von einem Einbein. Das schiebe ich voll aus (ist dann 1,9m lang) und halte es mir einfach vor den Bauch. Damit komme ich also 3m hoch ohne viel Gerümpel herumschleppen zu müssen. Klar, man muss etwas Erfahrung haben, einen guten Moment abwarten und auch ein gutes Händchen in den genutzen Tools beim Nachbearbeiten haben, aber dann geht es.