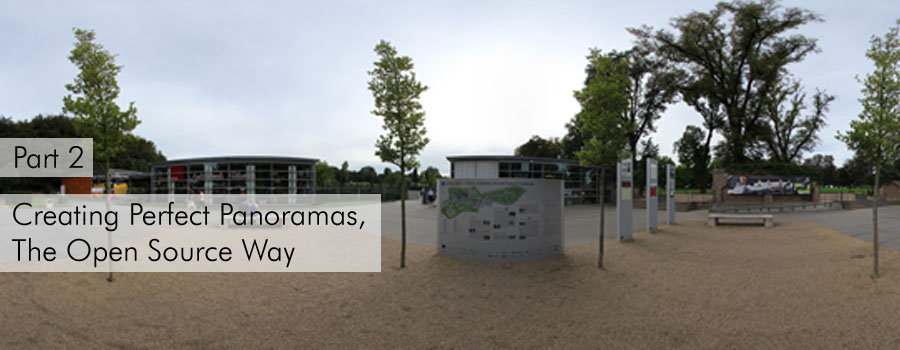
Introduction
Panoramic photography is a very specialized field of photography and in contrast to, let’s say portraits and nature photography, it’s not the first thing you get started with when getting your first camera. A lot of photographers and software companies are involved in panoramic photography and make a living out of it. That’s fair and my intention is not to set those people out on the street. But sometimes people want you to think panoramic photography is to be left to “the professionals” and that you shouldn’t even get started before you
- buy a panoramic tripod head for a couple of hundred bucks,
- buy various editing and stitching software for even more couples of hundred bucks and
- buy a Flash-based software to present your work on your website.
For me, there is definitely to much buying involved here! This series of articles tries to highlight every aspect of panoramic photography, always focused on keeping it low-cost and down to earth.
Other Articles in „Panoramic Photography Revealed“
Part I: Hardware for Panoramic Photography, DIY
Part II: Creating Perfect Panoramas, The Open Source Way (this one)
Part III: Creating Perfect Virtual Tours, The Open Source Way
Part IV: Appendix / Frequently Asked Questions
Creating Perfect Panoramas, The Open Source Way
The Toolchain as Abstract
First of all, I will give you the complete toolchain for creating perfect 360°x180° panoramas exclusively with free and open source software. Of course this also works for panoramas with a smaller FOV (Field of View) but I will show the workflow for a full sphere because you are simply in the most trouble doing so. By the way: If you don’t need special software to present your pictures and if you don’t have to stitch a nadir picture you are very likely to be done after step 1, using hugin.
I made this list for myself some time ago simply to not get confused by too many different tools in use. At first, this list also contained some commercial software, but I quickly understood that there was no need for the almost „simple“ tasks they had to do for me. So, this is now fully open source:
 -     Software     -            What happens here                  -       What you get
 ---------------------------------------------------------------------------------------------------------------------
 - Hugin            - Open Pictures, Settings & Stitch              - Equirectangular Picture without correct Nadir
 - Panini           - Open Equirectangular Picture, Look for Errors - If Errors Occur, Another Run in Hugin
 - SaldoConverter   - Converting Equirectangular to Cube Sides      - 6 Cube Sides in Tiff Format
 - Panini           - Create "Mirroring Hemisphere"                 - Image to Patch Bottom Cube Side
 - Gimp             - Editing Nadir and Zenith Cube Wall            - Correct Bottom + Top Cube Side
 - Gimp             - Adding Logo/Watermark to Bottom Cube Side     - Correct Bottom Cube Side with Watermark/Logo
 - SaladoConverter  - Converting 6 Cube Sides to DeepZoom Cubic     - Correct DeepZoom Folder Strukture for SaladoPlayer
To make you find the used software faster, I got the links collected up here:
- Hugin
- Panini
- SaladoPlayer/SaladoConverter
- Gimp
The Toolchain in Detail
So, let’s get started! You went to the countryside and made some nice looking pictures? You would like to stitch them together to a panorama covering a full sphere? If you don’t know how to shoot pictures in a way that they fit for this purpose, this is not the tutorial for you. I will start right after that step. If you need some help with the basics of panoramic photography, the tutorials on panoguide.com might be helpful for you: http://www.panoguide.com/howto/.
I will try to describe the steps as closely as possible to the workflow above, with the respective interaction you have to do, an overview about what you will get and how it will look after that step.
1. Hugin
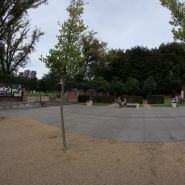
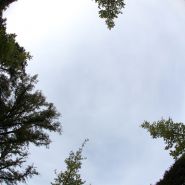
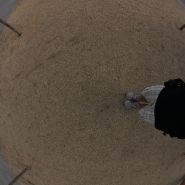
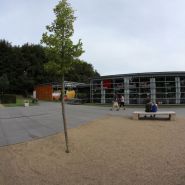
We have our pictures right from the camera, without any work done to it. Whether you made your pictures with a fisheye or a normal lense matters when configuring hugin. After that, the workflow is perfectly the same. In my case, I shot 4 picture with -5° tilt, one tilted up by 90° and one down with -90°, all made with a 8mm fisheye lens.
I will try to keep the tutorial about hugin as short as possible at this point. There are a lot of very good tutorial about hugin out there and you should always watch out for them. Hugin is a powerful tool and the better you know how to handle it, the less problems you will have following a workflow like this. There are also a lot of special cases, like panoramic photography using HDR which are not part of this tutorial but requires some more skills in hugin. Because the focus here is set on the entire workflow, it features a kind of „standard“ case of a spherical panorama. Still, as hugin is the central software of this workflow, it is not ignored.
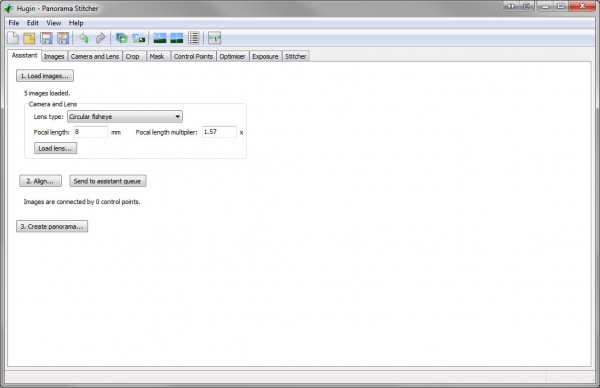
After loading the images in hugin, you need to provide information about your camera and lens so hugin can calculate the lens distortion and so on. It mostly is already given by the EXIF information and you don’t have to touch those settings (especially if you are e.g. working with a kit lens). I just select Circular Fisheye from the dropdown menu, tell hugin that I was using an 8mm lens and I am already done here. In most cases, you can now click on Align… and let hugin do the work. In my case, there is still one thing to do.
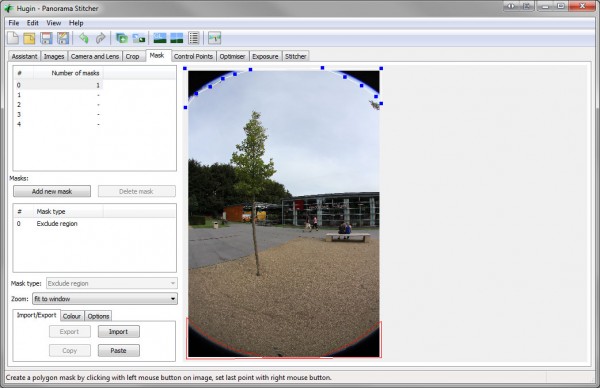
I set masks for all pictures, to let hugin ignore the black areas on my pictures. This can also be done by using the „crop“ function but for whatever reason this never really worked for me. Masking works instead pretty good and so is my way to work this out. It’s possible to save the mask and reuse it in the next project. Also masking is a good way of preventing ghosts or people showing up multiple times and getting rid of visible parts of the panohead or similar in the picture.
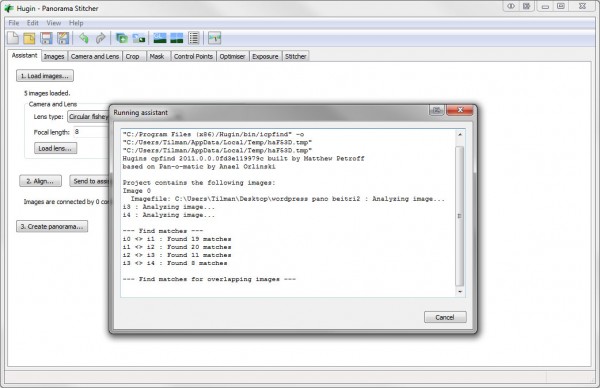
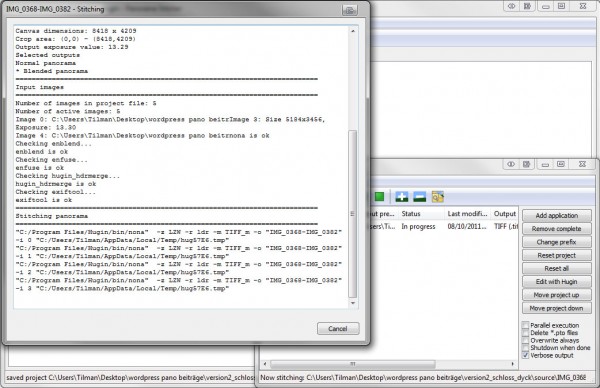
After that, you can hit the Align… button in the hugin assistant and let the magic happen. Hugin will now try to find control points in all the overlapping areas and so, aligning all the images. This might take a while, with a reasonable fast computer and only a few pictures like in this case, it’s done in less than a minute. While doing this, you will get such a window:
I added the first 5 of 6 images to hugin, so the picture made by pointing the camera downwards without the tripod is not included. It’s impossible to remain the camera rotated around the No-Parallax-Point by holding it with an outstretched arm and there would be a lot of wrong control points in the panorama. Without using it, there will be an area at the bottom hugin has no image information about and thus it will keep it blank. This is no problem, I will use the picture left over to fill that whole later.
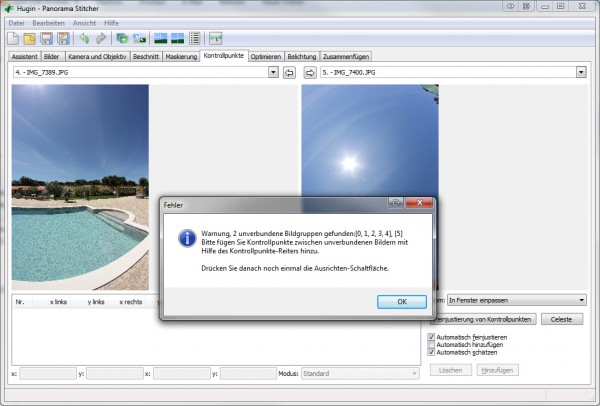
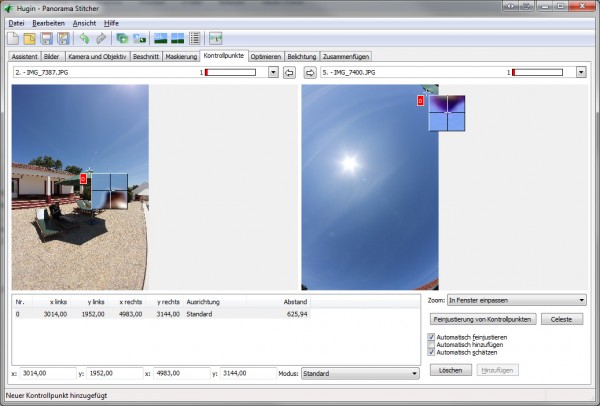
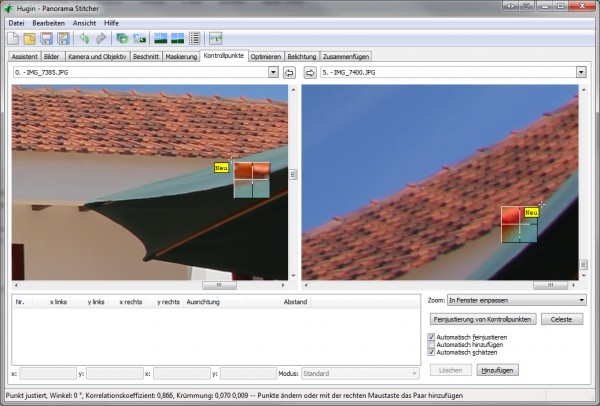
After the aligning is done, hugin sometimes throws me an error, that there are two groups of pictures that are not connected. This happens when the picture that was shot upwards contains a lot of similar looking blue sky which makes it really hard for hugin to find control points. The first group of 4 or 5 pictures usually is one 360° look around and the other picture is only blue sky. If so, manual work is required and I have to add some manual control points and let hugin align all pictures again. Let me show you quickly how it’s done with a different example:
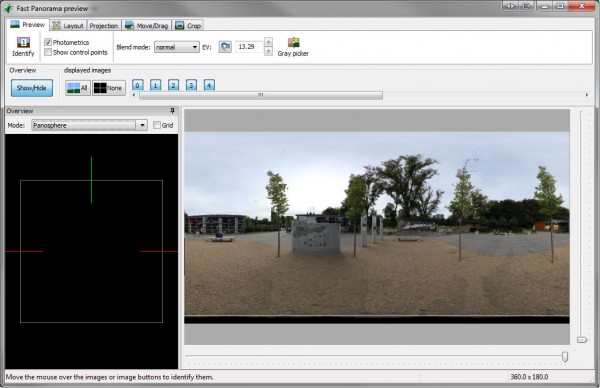
If you shoot a panorama indoors or with trees above yourself, you won’t get that error because hugin will have sufficient image information for stitching the picture pointed upwards. In the example I am presenting, this is the case. Thus, a very good result is achieved without manual correction and can be viewed right away with hugin’s built-in Fast Panorama preview.
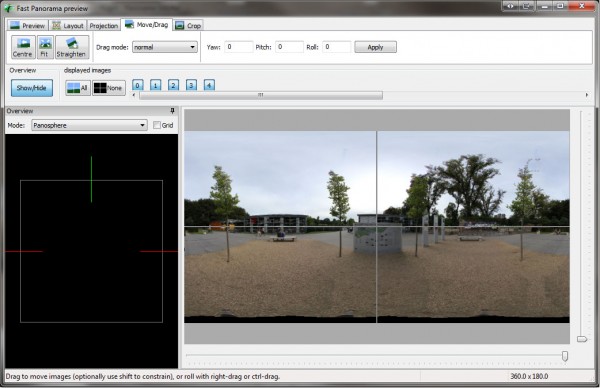
There is still some tweaking possible (and often necessary) in this window, but I won’t go into detail here. Still, one very important thing needs to be done here and that is, centering the resulting panorama. This will later decide wich side of the cube is being refered to as „front“. So, centering brings us there:
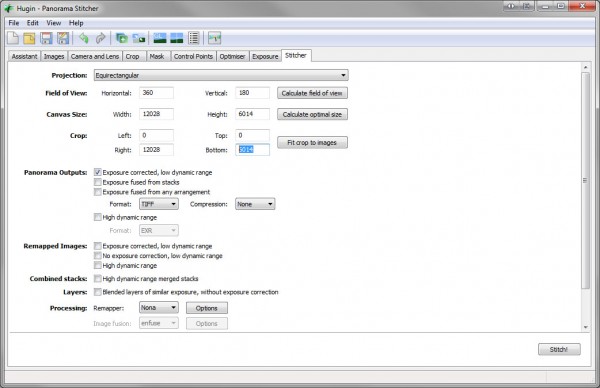
Note the black area at the bottom of the panorama, this is the area that needs manual work to achieve a perfect nadir picture. Hugin normally tries to crop the area so that you have a rectangular picture with straight borders. This is certainly desired if you wish to use the picture „flat“ e.g. in a header of a website or for printing. In our case, it’s not. First, the SaladoConverter and Panini both needs pictures with a width to height ratio of exactly 2:1 as input (because 360°x180° is of the very same ratio), cropping the image now will cause another unnecessary manual step. Second, we will work on the nadir picture nevertheless, so cropping just takes away already correct image information and is certainly no help here. You can now close the fast panorama preview window and go to the tab Stitcher to make the last settings before stitching. Click on Calculate optimal size to get the original resolution of the panorama, here it’s 12028 x 6014 pixels. If you had such a black border at the bottom, hugin will suggest a smaller cropping area below. Just set both setting to maximum size and nothing will be cropped.
Also, output format should be set to „TIFF“ and compression to „None“ as Panini is not good with TIFF compression methods and will cause problems when trying to open such files. After that, hit Stitch! and hugin will render the output file. This will look like this:
The result looks like this (resized version):
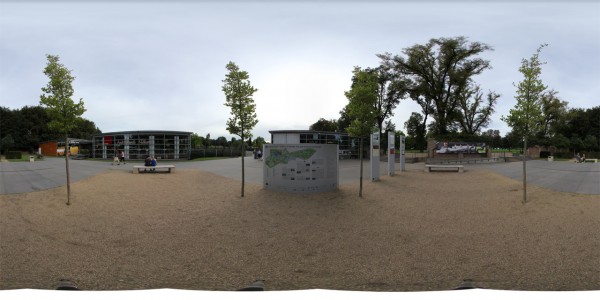 And here is a flash version of the same picture for you too look around:
The next step is simple, and that is checking the result hugin produced.
2. Panini
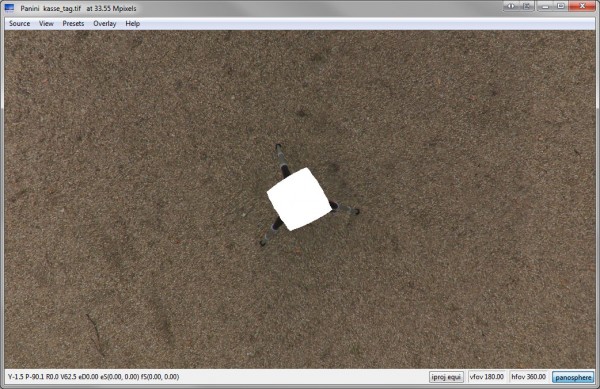
Panini is a nice standalone panorama viewer I use for checking the results of hugin. It’s very hard to find errors or just to evaluate the output of a panorama stitcher by viewing the image in a normal viewer (like Irfanview). It looks distorted in the upper and lower area, although the lower area is mostly the one you would like to check for errors. To view your panorama with Panini, just drag the created equirectangular image into the window of Panini and you can instantly look around and see your result. If you find errors that are based on wrong set control points or ghosts that could have been prevented by proper masking, you should go back to hugin and try for a second time. If the result looks fine, the most susceptible areas should be inspected, the zenith and the nadir. Looking down brings us something likes this:
The result is fine. You will harldy get a smaller footprint by using a tripod and the needed manual work is tolerable. Great, moving on to the next step. We need a way to work on zanith and nadir to make the result perfect. As you can’t work on the equirectangular picture that is made by hugin, you need to transform it to six sides of a cube. That is what the SaladoConverter is doing.
3. SaladoConverter
The SaladoConverter as well as the SaladoPlayer is a key software in this toolchain and they are both maintained by Marek Standio, who took over the PanoSalado project in 2010. It is a very specialized and well working piece of open source software and this tutorial aims on providing a good documentation about both applications to hopefully get more people to use it. Support for this project is a little low at the moment which is mainly caused by the fact that it is not well known in the community. I tried to support the development of SaladoPlayer with feedback and detailed bug reports in the last month and now, thanks to Marek Standio who is working his ass off for that project, it has become so advanced that it can almost compete with the leading commercial solutions.
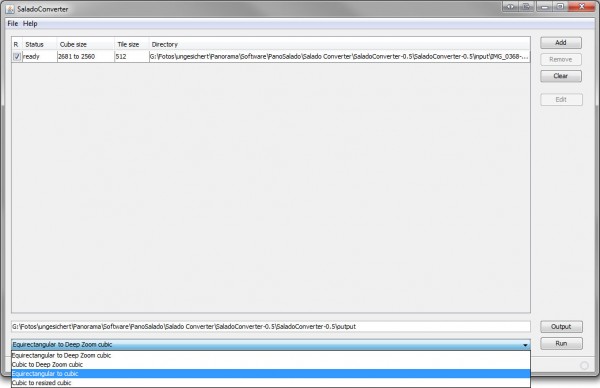
Usage of SaladoConverter is quite easy: Open the equirectangular picture, set an output path and select Equirectangular to cubic from the drop down menu. Let me give you one very useful hint here: If you haven’t done so already, you should give your panorama a short and easy name before you let SaladoConverter get into action. At this point it’s only renaming one file, but we will produce multiple files and whole folder structures with SaladoConverter over time and if you stay with the name hugin automatically chose ( like IMG_0368-IMG_0382.tif ) you will have that bulky name as prefix on all of your files later. It just makes configuration of SaladoPlayer much easier with a name like reception.tif, garden.tif or whatever you prefer.
The result is a set of pictures, covering all six sides of a cube. The equirectangular picture made by hugin is in contrast to that a projection of a sphere, where every pixel is positioned orthogonal to the middle of the sphere. The big improvement now is, that a flat surface like the ground, is actually projected as a flat one. By that, it’s very convenient to work on the ground with a picture editing software. So, the result of SaladoConverter is as following:
4. Gimp
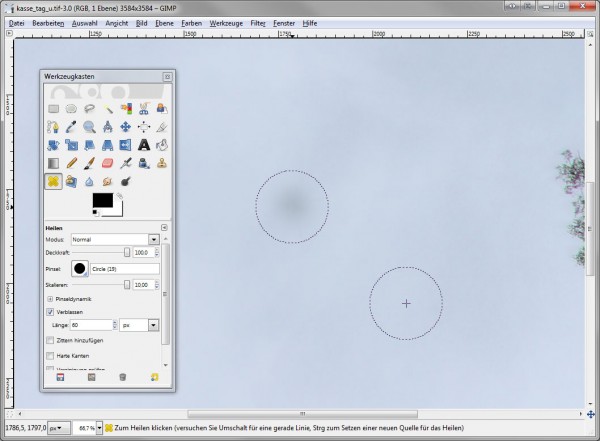
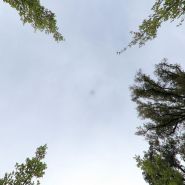
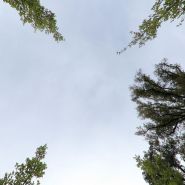
Next on the list is the gimp, a well known open source picture editing software. Gimp will help us do the final steps to achieve a perfect spherical panorama. First, there is the picture with the suffix _u, which stands for „up“. As I already noticed by viewing the panorama in Panini, the sky has a dark spot right at the zenith. This is a known error caused by enblend and enfuse (both algorithms used by hugin) but it’s not that bad, because this is fixed quite fast with gimp. After opening the image, you can use the healing tool to locate another part or the sky by ctrl-clicking it and then click on the spot to be healed. For that purpose I created myself a new brush in hugin, that fits my needs. Go to Windows > Dockable Dialogs > Brushes and click on the New Brush icon at the bottom. I made mine with a radius of 200px and a hardness of 0,88 so that you won’t see the hard edges of the brush when using it. It’s the same brush I will later use on the nadir picture.
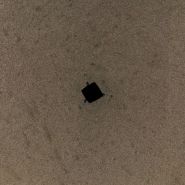
That is the zenith cube before and after using gimp:
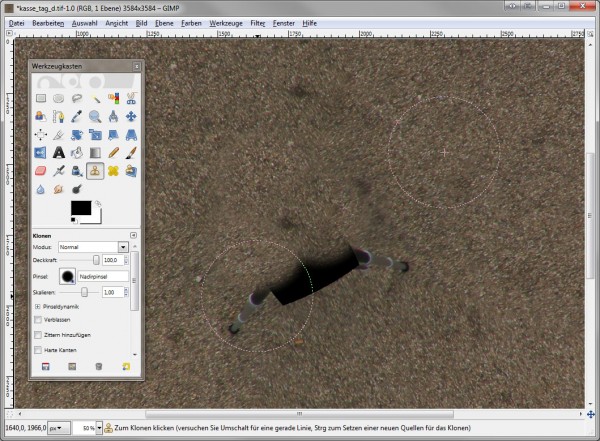
Next is the bottom cube side, which has the suffix _d for „down“. This is usually a little bit more difficult to do. There are actually different ways to deal with the nadir, I will show you the three most common ones.
1. Clone stamping
It is the easiest way, but it’s only working if you have a regular and/or natural underground like sand, grass, mud or small stones. Equally formed concrete, wood or carpet can also work, a tiled floor will instead give you a big headache. I just take my newly created brush and use gimp’s clone tool. It works just as the healing tool: Ctrl-click on a place located near to the area you would like to fix, and simply stamp over it.
2. Merging a handheld shot
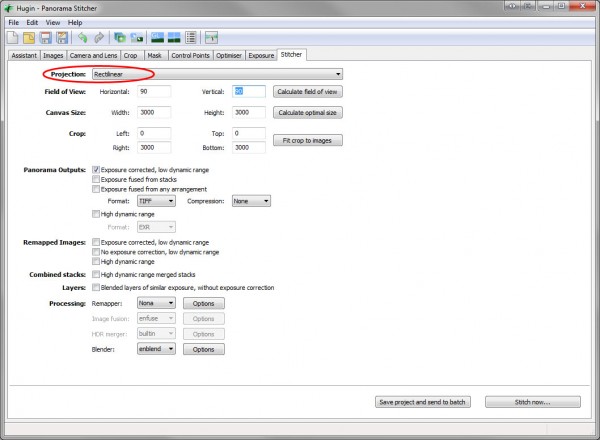
This approach is a little bit more sophisticated, requires more skill and time but produces the best results. First of all, you need a handheld shot of the ground. Before you can use that image, you have to desfish it, to make the ground become flat like it already happened in the bottom cube side. There is actually more than one way to do so, one way is hugin: Load only the handheld shot into hugin, set the lens settings in the Assistant tab like we did at the beginning and go directly to the tab Stitcher. Set Projection to Rectlinear and Field of View to 90° horizontal as well as 90° vertical and hit Stich now…
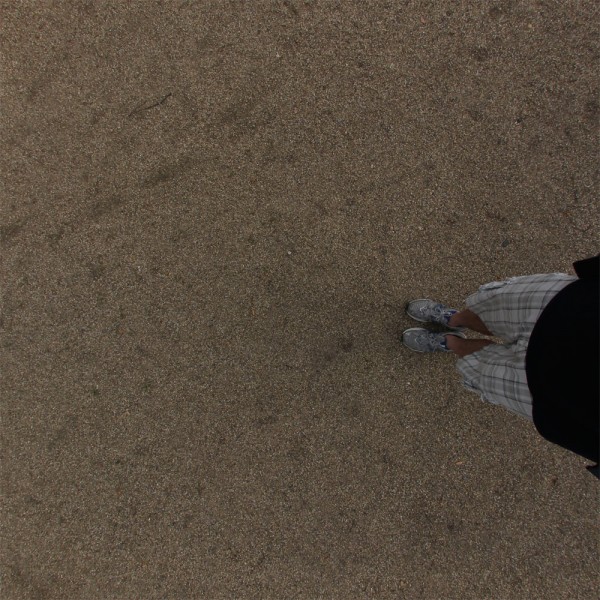
The result is a rectangular shot with a flat surface of the ground, similar to the bottom cube side created earlier. The result might be not as well as the one PTLens is able to produce (mentioned later), but already more than sufficient for my needs here. At this point, I would like to thank and give credits to John Houghton for helping me figuring out this little trick!
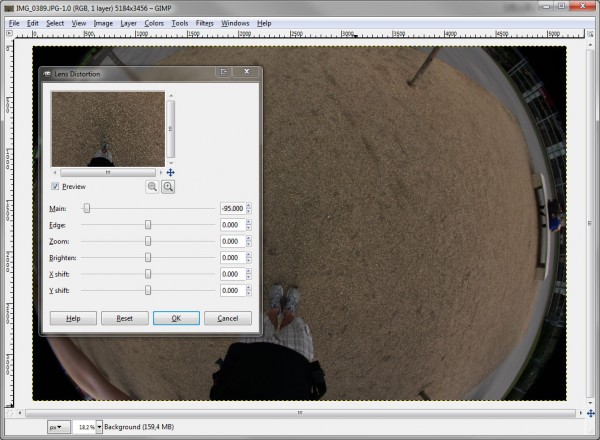
A completely distortion free picture is not necessarily needed for this purpose. Gimp is also able to remove the distortion in a centered area of the picture large enough. As you are already working in gimp, open the picture, go to Filters > Distorts > Lens Distortion. You have to experiment with the settings here, best way to do so is by taking a shot of a tiled floor and play with the settings until the tiles are orientated in a perfect rectangular matrix. In my case, I just set main to -95. After that, the edges of the picture are now distorted in a different way, but as I am only interested in the middle part, this is sufficent for me.
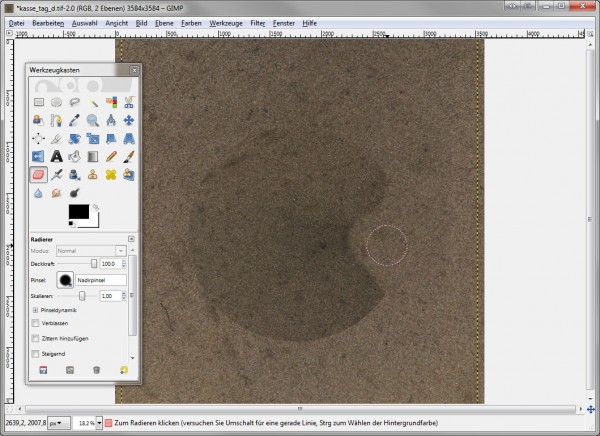
However you defished your nadir shot, make a large circular selection and copy it to the bottom cube side you are going to fix. Choose the eraser tool and select the new created brush (recall: radius=200px, hardness=0,88) to erase your feet. Then you probably need to skale and rotate the inserted images to make it fit the underneath lying ground.
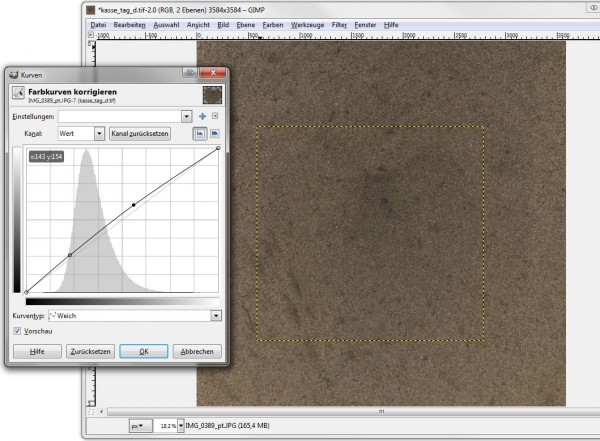
You can also lower the opacity of the eraser or create another brush with even softer edges, everything that helps the image merge with the background. Then, open the curves of the inserted image on right click > Colors > Curves and make it fully vanish. There are other ways to merge the handheld picture with the bottom cube side, but they are similar. The combination of color manipulation, soft edges and brushes with partial opacity will let you reach you goal. Of course you can also use the healing or clone tool after merging the two image to improve the result even more.
3. Adding a logo/watermark
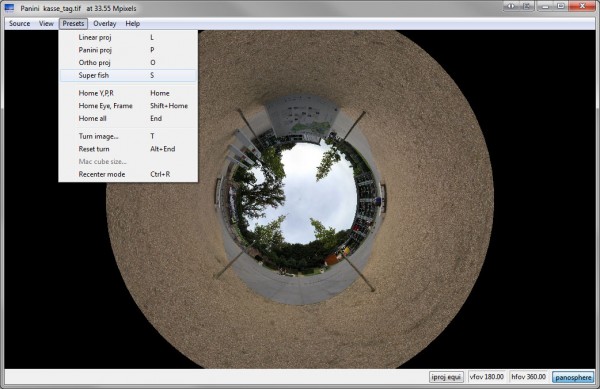
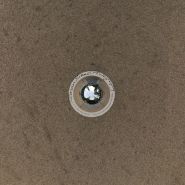
If you think this is to much effort for the nadir image, you can also let the tripod footprint stay untouched and simply place your logo or your watermark on top of it. A lot of photographers like to use a reversed little-planet view of the actual panorama what looks a little like a mirroring hemisphere laying on the ground. I will show you how to achieve this effect. Open your equirectangular panorama another time with Panini, go to Presets and set the camera mode to Super fish. Tilt up and zoom out, and you will get the desired effect. You can save a picture of the current view by clicking View > Save as… or simply by making a screenshot.
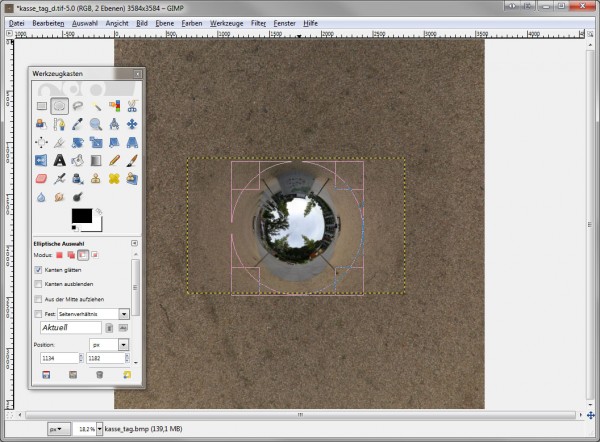
Open the created image in gimp and crop it with a circular slection. To draw a circular selection, you need to select the Ellipse Select Tool and draw the ellipse with pressed shift button. Then, right click > Select > Invert and hit the delete button.
You are now free to design around your mirroring hemisphere after your fancy. Of course, you can approach your nadir logo on totally different ways. Maybe you even like to merge a handheld shot first, and than place a logo. I did that in a lot of panoramas. Here is where photographers will differ. Check the following examples to view all the different results: Starting with the untouched bottom cube side, then the clone stamped one, the merged one and finally one version with a logo made like mentioned above.
5. SaladoConverter
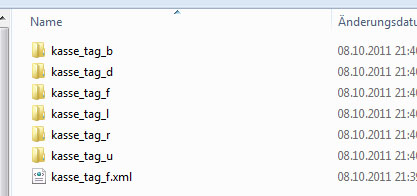
When you finish your bottom cube side, you are almost done. Open the SaladoConverter again and add all 6 sides by clicking on Add and selecting multiple files with shift or held down ctrl key. It is important that you keep the name structure intact, because SaladoPlayer won’t recognize the cube if one side has the suffix _d2 for example. This time, choose Cubic to Deep Zoom cubic from the drop-down menu in SaladoConverter and let it do the work. The result will be a folder structure that follows the Microsoft Deep Zoom specifications and that looks like that:
The folders with the suffix from „b“ to „u“ now contain the six cube sides in different resolutions, that are additionally tiled like you know it from Google Maps for example. SaladoPlayer will thus be able to reload tiles only if needed and you can easily upload very high resolution pictures without killing your visitors bandwith. The .xml file with the suffix _f will be called from SaladoPlayer’s configuration to enter the panorama. I will get there in the third part of „Panoramic Photography Revealed“.
Here is what it will look like, the finished panorama with corrected zenith and nadir:
Software that didn’t make it to the team, but is still worth mentioning
My intention was clear right from the beginning: Describing a comprehensive workflow solely based on open source software. So far, I have not seen anybody doing that and I have to admit, it was quite a challenge. By that, I made high demands on the used software. There is a lot of free software out there, that didn’t make it to team simply for not being open source.
So, here is a short list of tools that just didn’t meet my high requirements, but I consider to be worth mentioning.
DevalVR Player (http://www.devalvr.com/paginas/productos/index.html)
The DevalVR Player is a standalone panorama viewer just as Panini. Those two tools are actually quite similar. Panini offers more functionality and works cross-platform, the DevalVR Player shows huge panoramas more fluently and is faster when opening big files. It is not easy to decide which program I prefer. I haven’t found a tool with a comparable speed as the DevalVR Player so far, so if you are using a Windows computer it’s simply the easiest and fastest way for that purpose. For me, it was clear Panini would be featured here, because all of the tools are now cross-platform and the described workflow can be reproduced on pretty much all systems. As I see it, there is very little chance DevalVR will be available for Mac or Linux soon, as it is not open source and the developer seems not to be willing to change that.
In conclusion, still a very good piece of software, that is easy to use, available for free and thus a good deal for all Windows users.
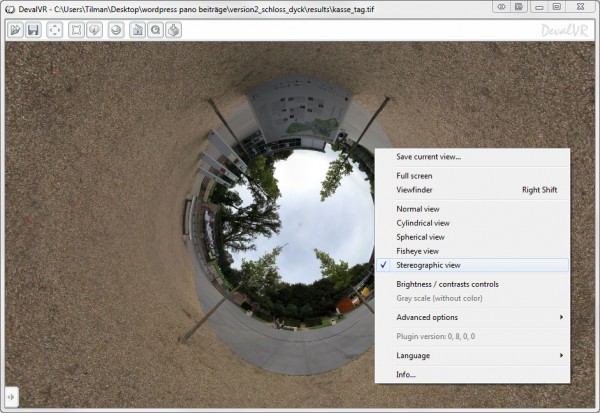
Here is a screenshot of the DevalVR Player showing the possibility to extract the same little planet view as I did with Panini. One difference should be mentioned though: Panini saves the current view in original resolution while the DevalVR Player just saves it in the resolution of the window, like doing a screenshot. If you like the little planet view, and your aim is to convert a equirectangular panorama to a little planet, Panini should be your choice.
PTLens (http://www.epaperpress.com/ptlens/)
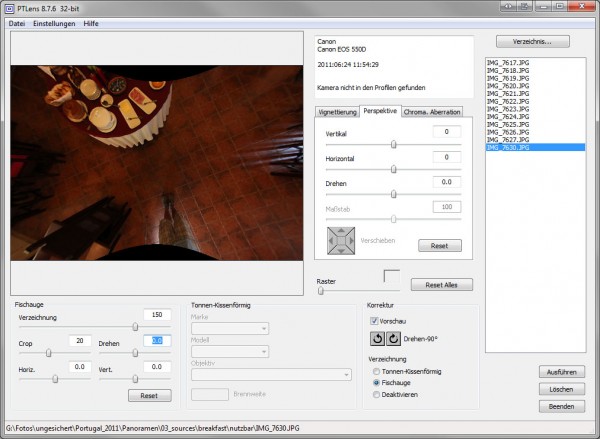
PTLens is a software invented by Tom Niemann that is able to correct lens distortions such as chromatic aberration, vignetting or barrel distortion. It started as freeware in 2002 and has developed impressively since. Today, it is one of the most advanced programs in that field, is available as Photoshop plugin and beats the mentioned adobe product in many ways. But, and that is an important „but“, it is now 25$.
For what you get, this is certainly not much and it probably will go unnoticed if you work as a professional. Still, it couldn’t make it into the workflow that way. So here is a quick look at PTLens anyway:
Conclusion
As I have shown, a completely open source software (OSS) based workflow for creating perfect panoramas is possible. In the third part of this series, I will present the workflow that eventually leads to a high-level virtual tour, showing that it is even possible to rely on open source software from the moment the pictures were shot until online release. My hope is, that this series will push the open source idea within the panorama community and that others will contribute to the mentioned projects. Because that is why OSS is such a good idea: Opening your source code and letting others contribute can really speed up development, even without having a lot of money at hand. We all have seen it many times, we all use OSS every day. Right now, I write this article in WordPress that is opened in Firefox, both two very popular OSS projects. So, why not my panorama software?
Please feel free to comment if you have questions about the workflow and especially, if you have tips to improve it.
All drawings, pictures and texts are licenced under the creative commons license by-nc.
If you liked this article, please show your appreciation by sharing it! I am also glad about a click on the flattr button, or a small paypal donation that is possible via the button in the sidebar on the left.



[…] Beginner to intermediate:http://www.youtube.com/view_play_list?p=15B8C737F69319BEhttp://www.rosaurophotography.com/html/technical0.htmlhttp://www.tilmanbremer.de/2011/10/panoramic-photography-revealed-part-ii-creating-perfect-panoramas…http://www.fromparis.com/technical.htmlhttp://michel.thoby.free.fr/http://www.panomonkey.com/panorama-software/how-to-shoot-panoramic-photoshttp://www.cambridgeincolour.com/tutorials.htmLevel a panorama in PTGuiHow to level a panorama in PTGui […]
[…] Pro začátečníky a mírně pokročilé:http://www.youtube.com/view_play_list?p=15B8C737F69319BEhttp://www.rosaurophotography.com/html/technical0.htmlhttp://www.tilmanbremer.de/2011/10/panoramic-photography-revealed-part-ii-creating-perfect-panoramas…http://www.fromparis.com/technical.htmlhttp://michel.thoby.free.fr/http://www.panomonkey.com/panorama-software/how-to-shoot-panoramic-photoshttp://www.cambridgeincolour.com/tutorials.htmHow to level a panorama in PTGui […]
Hello Tilmann,
1. Could you post the results of the hugin optimizer output for this sample?
2. If you are using an 8mm/3.5 Peleng Fisheye, you could get around the problem with no control points for the zenit shot, if you would pitch the camera around 60° to the horizontal and additionally 8-10° to the vertical. In this configuration you don’t need to shoot an extra zenit and end up with 4 + 1 (Nadir) pictures and no problems with hugin.
I am not sure what you mean. I guess this:
average control point distance: 1,383631
standard deviation: 0,858550
maximum: 4,340980
Don’t you mean a tilted panohoad like I built one as described in part one of the series? It’s true, it’s a good way to avoid a zenith. But on the other hand, most of the time it’s no problem to shoot a zenith, so I just do it 😉
Great work. Looking forward to the third part. I am interested in virtual tours. When will be third part done?
Best regards, Martin.
Hello Martin,
I am already working on the third part, a rough first version is about to be finished. Maybe I will post a first version soon and extend it later.
Thank You for Your responding, It will be very helpful for me.
Best regards, Martin.
[…] < Photo Techniques < Fotografia < nico59 Get flash to fully experience Pearltrees Panoramic Photography Revealed. Part II: Creating Perfect Panoramas, The Open Source Way « Tilman B… Introduction Off the shelf There is a number of commercial panoramic tripod heads on the market, […]
Just wanted to say that there is another free program to quickly check the equirectangular image.
I am just mentioning it because Panini won’t run on newer ATI cards.
The program is called FSPViewer
It is free and works on Windows 32/64 bit OS. It is not as powerfull as Panini (can’t do any transformations) but it is quite useful to check equirectangular images.
Want to share with information about Inpaint, it is not free, but very cheap, and with it you are able to repair panoramic images and fill black areas, here is tutorial on developers site: http://www.theinpaint.com/inpaint-how-to-fill-black-areas-of-a-panorama.html
[…] Panoramic Photography Revealed. Part II: Creating Perfect Panoramas, The Open Source Way « Tilman B… […]
Is there any program to do it automatic?
Is there any link for salado convertor for windows (other than smug) or any other freeware to replace salado convertor?
Thanks for your share
with Hugin 64byte I cannot deal with the pictures automatically ,
I mmust select the control points myself everytime , Why cannot it detect the controle points itself ?????
waiting for you reply ! thank you