Introduction
Panoramic photography is a very specialized field of photography and in contrast to, let’s say portraits and nature photography, it’s not the first thing you get started with when getting your first camera. A lot of photographers and software companies are involved in panoramic photography and make a living out of it. That’s fair and my intention is not to set those people out on the street. But sometimes people want you to think panoramic photography is to be left to “the professionals” and that you shouldn’t even get started before you
- buy a panoramic tripod head for a couple of hundred bucks,
- buy various editing and stitching software for even more couples of hundred bucks and
- buy a Flash-based software to present your work on your website.
For me, there is definitely to much buying involved here! This series of articles tries to highlight every aspect of panoramic photography, always focused on keeping it low-cost and down to earth.
Other Articles in „Panoramic Photography Revealed“
Part I: Hardware for Panoramic Photography, DIY (this one)
Part II: Creating Perfect Panoramas, The Open Source Way
Part III: Creating Perfect Virtual Tours, The Open Source Way
Part IV: Appendix / Frequently Asked Questions
Hardware for Panoramic Photography, DIY
There are several companies out there selling very good, but also very expensive panoramic tripod heads. Those are mostly of very good quality and I guess the price is not really a big deal for professionals, their equipment quite often is about 20 or 50 times the value. You can find a pretty complete list of manufactors on the panotools website. But if you like to get started with panoramic photography as non-professional you are probably not convinced about investing 300€ before you even know if panoramic photography is the thing for you. For me, it was the same. So I searched for do-it-yourself tutorials of panoramic heads and I indeed found a lot.
But, most of them were focused on the regular guy without a lot of tools at hand and used very basic materials from the hardware store as well as pretty easy assembly techniques. The results were fair for the effort, but they have some problems competing with the commercial solutions. Sometimes they even need additional commercial photography equipment, like air levels, exchangeable mounting plates or similar. I’ve seen tutorials where the result was about 100€, which in my opinion, has left the low-cost sector.
Various (quite good) tutorials can be found here (in German): http://www.heiliger-net.de/panphoto/hardware.htm (Simply scroll down to the bottom of the page)
Other tutorials in English might be interesting for you:
- http://www.stockholmviews.com/diyphotogear/pano_head.html „El Cheapo“
- http://www.mejiatryti.com/Panoramas/diyqtvrhead.html Why not try wood?
On the other hand, there are self made panoramic heads out there so professional, it scared me a little bit. One example is the one made by Dr. Sean Parkin, which looks as professional as the ones you can buy:
After looking through several of the tutorials I decided to construct my own. I have access to my fathers workshop, who is a locksmith, so I was able to manufacture my panohead a little bit more precise and sturdy than others. In total I made 3 versions of panoheads so far, because my needs changed over time and I had some improvements that came to me while using my panoheads.
Please notice that the manufacturing of the following panoheads requires welding (2 and 3), drilling and edging (all of them). If you have doubts about doing that or if you don’t have the possibility to do such works safely, please consider using one of the more simple tutorials linked above or have it done by a professional.
Panohead Version 1
Download all CAD Drawings of Panohead Version 1 as PDF
Download all CAD Drawings of Panohead Version 1 as prt and asm for Pro/ENGINEER
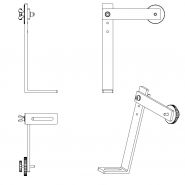
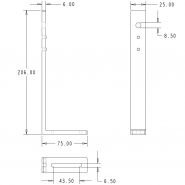
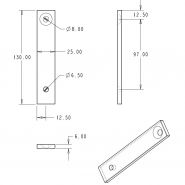
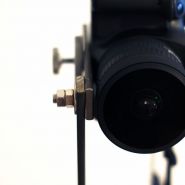
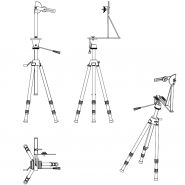
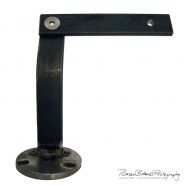
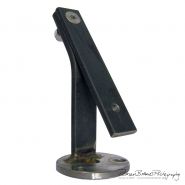
Despite of the shown parts that need to be manufactured, you need a screw to connect the stand and the arm of the panohead. The first drawing is the first version that was changed right while being made. As you see on the pictures and the drawing of the arm (or on the drawings of panohead 2 and 3) I used a countersunk screw, because the other way round the screw head would make it impossible to mount the camera. The screw is a M8x30 countersunk screw tightened by two M8 nuts that are used to achieve a nut lock. And of course you shouldn’t forget to place a washer underneath! I used that mounting for all of my panoheads, as you will see later.
You will then need a way to mount the panohead onto your tripod and the camera onto the panohead. In my case, this was an easy task. As tripod I use a Sony VCT 20A. It’s pretty easy to remove the knurled-head screw that is intentionally used for the camera and use it to mount the camera onto the panohead. The resulting empty drill hole can be easily used to mount the panohead with a M6x40 screw onto the tripod. I used M6, because it’s a screw thread which is in wide use and easy to get (at least in Europe) and fits quite good in a drill hole intentionally made for a 1/4″ screw. You might need a different length then 40mm, depending on your tripod. Also, this won’t work if your tripod is equipped with an exchangeable mounting plate. If that’s the case I kindly ask you to search for inspiration in one of the many tutorials out there ;-). It’s not that different after all.
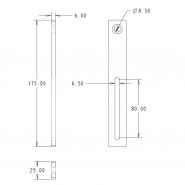
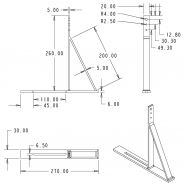
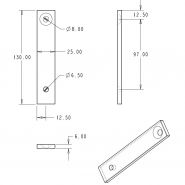
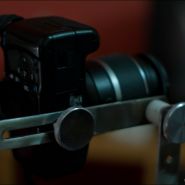
On the pictures you will see the arm to be slightly different. The one with the slot hole is my first version. One fits all, thus it can be used with every camera and every lens and it is perfect to define the NPP (No parallax point). You can see a drawing of it within the drawings of the second panohead. Once you defined your NPP I advise you to make yourself a new arm, tailor-made for your camera/lens combination. It’s such an easy part to build, and it’s a lot easier for you in the field, because you never need to think about where the correct position is. You don’t even need to make a mark.
I designed, sketched and built that head in October 2010. It was my first construction and it works satisfactorily so far. Even though its made of pure steel, the weight is still in a tolerable range for me. It easily holds a fully loaded DSLR without getting wobbly or anything similar. But as you already guess, there are some cons that made me built another one. Those are:
- With the knurled-head screw that fixes the camera to the arm, it’s not possible to let the camera point straight up (tilt = 90°) because the screw head will touch the stand at something like 70° tilt. This is not a problem when using a fisheye lens but can be in some cases.
- I designed the slot hole on the bottom of the stand a little short, because I thought it just needed to fit my camera and that would be it for the next years. This might be true as long as you don’t get yourself a battery grip. I get one myself and voilà, a new panohead was needed.
Panohead Version 2
Download all CAD Drawings of Panohead Version 2 as PDF
Download all CAD Drawings of Panohead Version 2 as prt and asm for Pro/ENGINEER
The basic idea of this head is actually not different to version 1. A few improvements have been made to fit my needs:
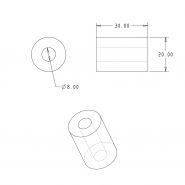
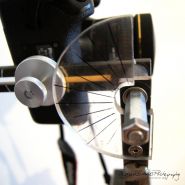
- A spacer block sets the arm 30mm away from the stand and makes it possible to rotate the camera 360° around. The knurled-head screw is no longer keeping me from pointing the camera straight up.
- The slot hole in the stand was lengthened by about 60mm, to make my camera fit the panohead even with the battery grip. By the way, it’s a Canon EOS 550D / Rebel T2i / Kiss X4 we are talking about.
- The stand has been designed to be sturdier. The bottom flat steel of the stand is now 30×6 instead of 25×6, the erect part is made from 20×5 flat steel instead of 25×6. Because the erect part is designed from weaker material, it has been reinforced by the same time. The support from the backside increases the stiffness and makes the panohead now support really heavy gear. Now we are talking a DSLR with mounted (and fully loaded) battery grip and a really heavy zoom lens. No problem at all.
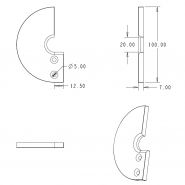
Additionally, there is an indicator made from acrylic glass mounted on the side to show the tilt in steps of 15°. It was originally made for the first version of the panohead but I took it, because this much precision is usually only needed when using normal or telephoto lenses which is now the task of panohead 2.
This panohead is capable of pretty much anything. It can hold a DSLR with or without battery grip, with a fisheye, a normal lens and even heavy telephoto lenses. When I go out on a pano-tour it’s the tool I have with me. An If I plan to do a gigapixel panorama, I now got the right tool.
But… there is again a „but“. Sometimes you are in the fields and you just want to travel light. Maybe making panoramas is not even your intention, then the second panohead is definitely too much to carry around. First, the weight is about 1100g with all necessary screws. And second, the head in combination with the tripod is nothing you can easily fit in your backpack neither. And there is another situation where this kind of panohead is just not the first choice: If you have not enough space to set up your tripod, if there is a crowd or simply if you need to be fast set up and ready. That’s why I designed the third panohead to be used with monopods.
Panohead Version 3
Download all CAD Drawings of Panohead Version 3 as PDF
Download all CAD Drawings of Panohead Version 3 as prt and asm for Pro/ENGINEER
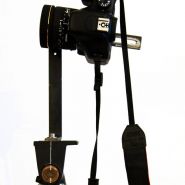
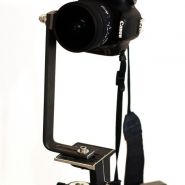
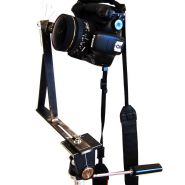
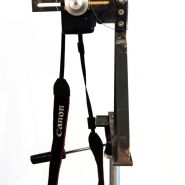
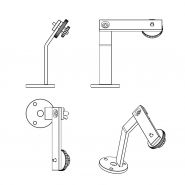
This panohead is especially designed for a combination of a specific monopod, a specific camera and a specific lens. In this case, a GIOTTOS MML 3290B, a Canon EOS 550D and a Samyang 8mm f/3,5, a lens which is also known under other pseudonyms, like Walimex, Falcon, Bower or Polar. Mine is a Falcon.
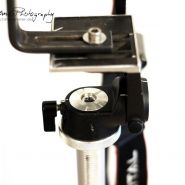
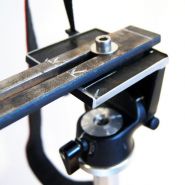
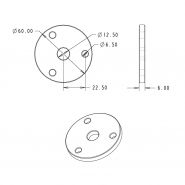
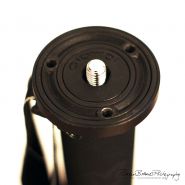
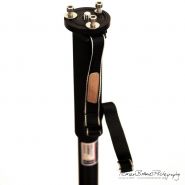
The GIOTTOS MML 3290B monopod was not chosen by accident, but because of a very helpful feature. When I started to think about a panohead for a monopod, I wasn’t sure how I would mount the head later on. Most monopods have a 3/8″ thread or sometimes both, a 3/8″ and a 1/4″ thread for mounting monopod heads. Usually I would say „let’s tap the needed thread in a solid steel plate and use it as base for the panohead!“. What most people can’t do because of the tools you need is normally no problem for me. But not in this case. No one in the right mind has a 3/8″ screw tap in Germany, me included, no offense. But the engineers at GIOTTOS came to help me: By placing three M6 threads in the mounting plate they set up the perfect basis for me to build on. (Pictures coming soon) Intentionally, they were used as a way to secure a normal head by tightening three grub screws from underneath. I simply removed the grub screws and replaced them with three M6x16 cylinder-head screws.
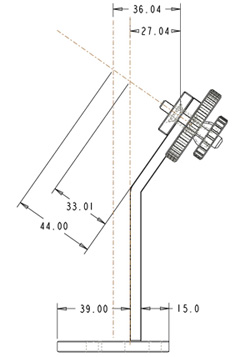
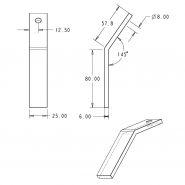
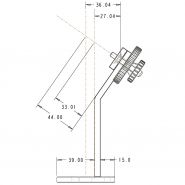
This specific panohead only fits one specific type of camera. As you can see on the last drawing, the height of the center of the lens is in my case 38mm. I only added the thickness of the arm because that way it’s easier to check if everything is accurate wrought in the workshop, so: 38mm + 6mm = 44mm. The last drawing in fact is just there to help checking and assembling the head in the workshop.
As you should have noticed already, the third panohead version is a „slanted“ one. This term is commonly used in panoramic photography. By using a „slanted“ panoramic head, it’s possible to shoot only one row of pictures with the result of very little space left to manually work on (mostly on the ground) and that, even with cameras with cropped sensor (like mine). Additionally, the camera can be rotated 360° around the slanted axis, which would not be possible in such a small design by using a vertically erect stand like in version 1 and 2. That way, it was possible to keep the weight at around 500g including screws.
Conclusion
There are a lot of good panoramic heads out there, here are some more self made ones. I hope this article helps if you think about making your own panohead and if you like to go a little bit further than assembling parts from the hardware store. I am aware that some measures only fit in my case, but maybe someone can adjust them to his or her needs.
Please feel free to comment, tell me if you like the constructions or if you have ideas to improve it!
And if you make your own panohead based on my drawings, please let me know, it would be great to hear that.
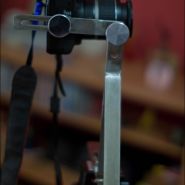
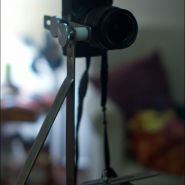
Edit: I got a nice response from Ricardo Moura, a photographer from Recife, Brazil who built a panohead based on my second construction. He used slightly lighter shapes and stainless steel, also, he used nylon instead of steel for the spacer to achieve smoother moves. Have a look at his construction:
Unless noted otherwise, all drawings, pictures and texts are licenced under the creative commons license by-nc.
[…] < Photo Techniques < Fotografia < nico59 Get flash to fully experience Pearltrees Panoramic Photography Revealed. Part I: Hardware for Panoramic Photography, DIY « Tilman Bremer –… Introduction Panoramic photography is a very specialized field of photography and in contrast to, […]
What you do by your tutorials is just wonderful job! God bless you for teaching dummies like me…
[…] Panoramic Photography Revealed. Part I: Hardware for Panoramic Photography, DIY « Tilman Bremer –… […]
Have you ever considered writing an e-book or guest authoring on other sites?
I have a blog centered on the same topics you discuss and would really like
to have you share some stories/information. I know my subscribers would appreciate your work.
If you are even remotely interested, feel free to shoot me an e-mail.
Hi Tilman… This is my proposition for my students in Colombia, for a cheap panohead in acrylic: http://www.mariocarvajal.com/rotula-panoramica-casera-diy-panohead-made-in-colombia/ Regards!